
Quick Summary: Design a kitchen garden by starting with what you want to cook, then selecting 5-12 vegetables that match your space. Plan paths and structures before placing plants. Use succession planting for continuous harvests. This guide covers plant selection, design styles, blueprints, spacing, and equipment. Read time: 15 min | Experience level: Beginner to intermediate
Jump to: Plant List | Design Ideas | Draw a Blueprint | Growing and Harvesting Plan | Succession Planting | Equipment List | FAQ
I’ve been growing row crops for the farmers’ markets for over 20 years, but I always save a spot on our farm for a kitchen garden where the focus is more about beauty and growing food for the family.
A “kitchen garden” is focused around the food your household enjoys eating and can be a small vegetable garden in the backyard or a large area set aside for a specific theme or cuisine.
This guide walks you through the process of starting your own kitchen garden step by step: refining your plant list, choosing a design style, creating a blueprint, and planning your planting schedule.
I use Italian vegetables as the example, but the process works for any type of kitchen garden.
This post may contain affiliate links. As an Amazon Associate, I also earn from qualifying purchases. You can read our disclosure information here–
Step 1: Create Your Plant List
- Start with listing the type of Italian food you most enjoy eating or cooking and then identify and make a separate list of the essential herbs and veggies that would be needed for those dishes
- Depending on size of your garden pick 5-10 veggies from this list. I have a large garden plot so I chose 12 veggies and herbs, each with 2-3 different varieties. If your garden is small, or if you are growing in pots, the options will be more limited.
- Try to include at least one variety of each of these annual vegetables (perennials will be reserved for containers or pots):
- beans
- tomatoes
- sweet bell peppers
- kale
- eggplant
- squash
- onions
- radicchio (or endive or escarole)
- broccoli
- lettuce
- fennel
- herbs: basil, oregano, or parsley
- Try to include at least one variety of each of these annual vegetables (perennials will be reserved for containers or pots):
- If you are starting plants from seed, order seeds from a reputable seed company. Choose annual vegetables and herbs, as they will be easier to till under or remove in the Fall so you can start anew the following year. You can start with my curated list of Italian vegetable seed varieties that are traditionally found in kitchen gardens.
- Add some flowers to your plant list (again, annuals only). Select flowers for color, pollination and/or garnishes. Flowers that would work well in an Italian garden include:
- marigolds
- calendula
- nasturtiums
- sunflowers
- violas
- cosmos
- Select some Italian perennial plants that would look good in large containers as design focal points. Suggestions would be:
- bay tree
- lavender
- citrus trees
- rosemary
- artichoke or cardoon

Step 2: Choose Your Garden Style
Think about your personal style (as well as your time and energy). Do you lean towards casual and rustic or more formal and elegant?
Do you enjoy whimsical garden whirligigs or nice neat rows that are easy to harvest and will give you high yields?
Here are a few inspirational photos that might give you some ideas:
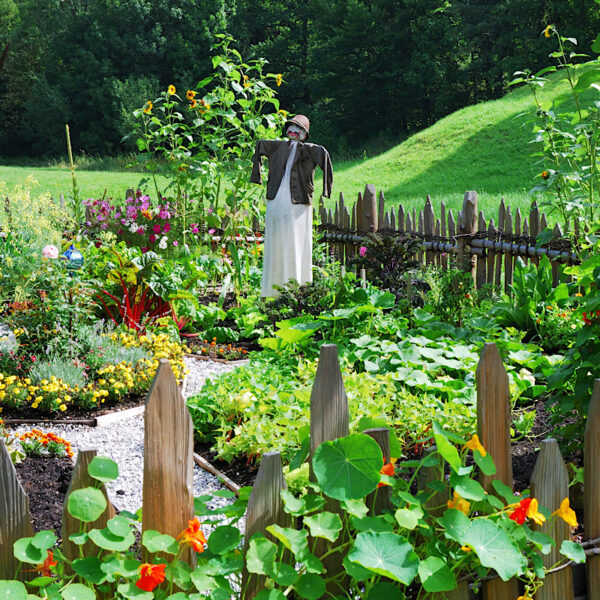
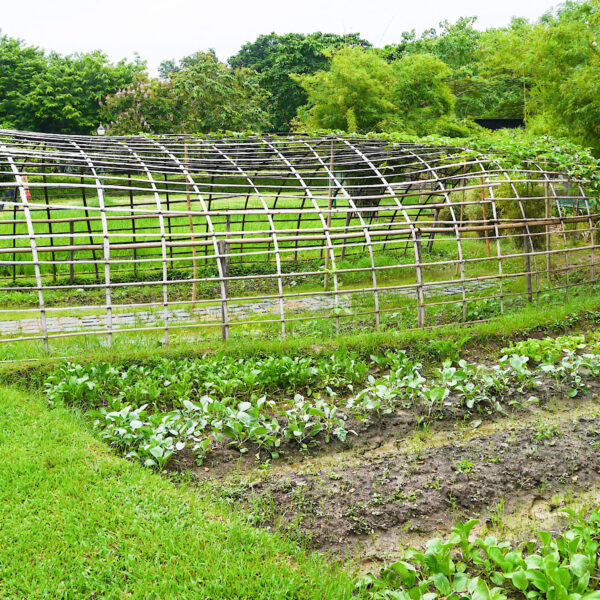
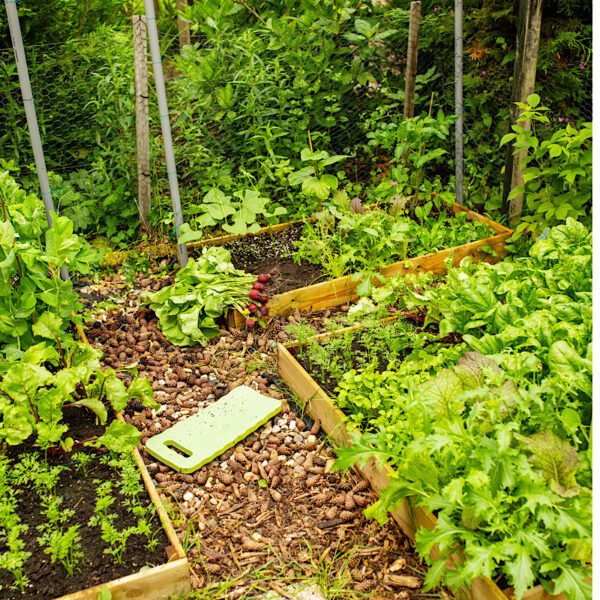
Rustic or Whimsical Design Style:
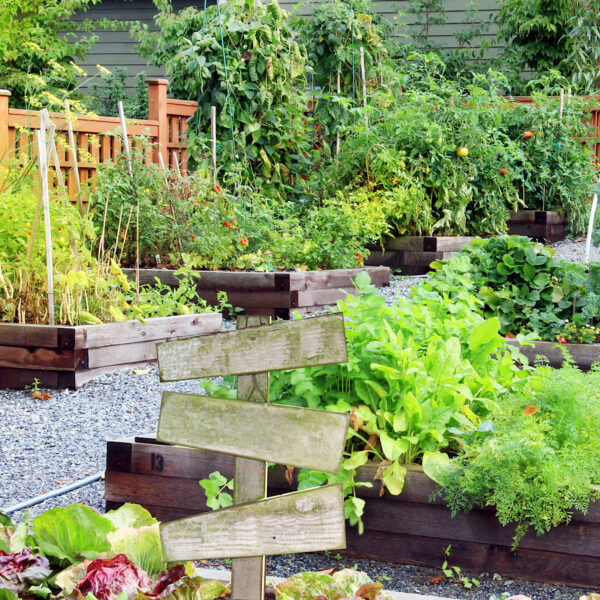
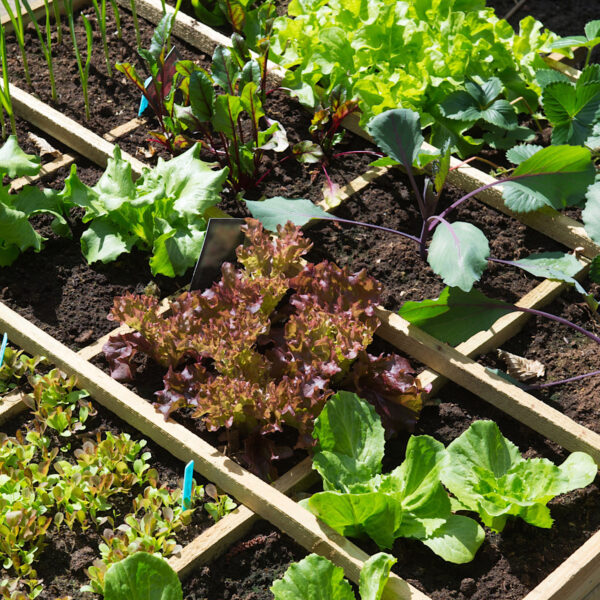
Design Ideas for Raised Beds:
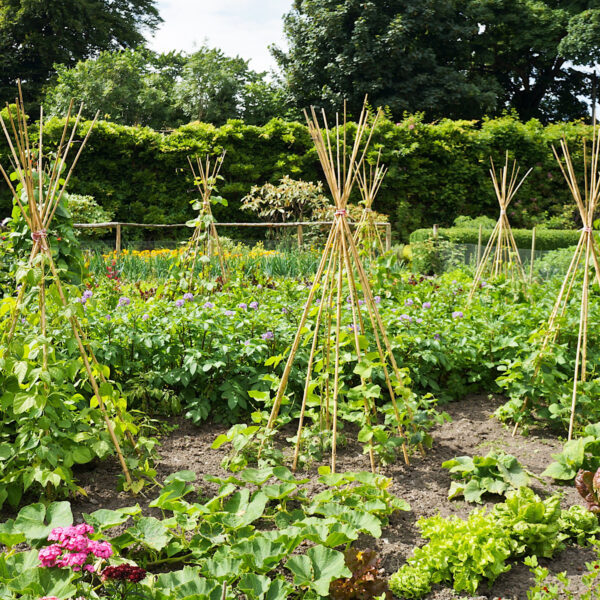
Design Ideas for High Yields:
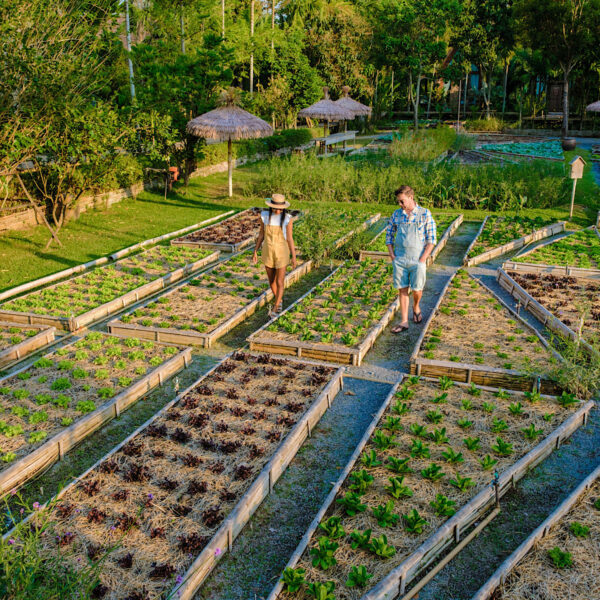
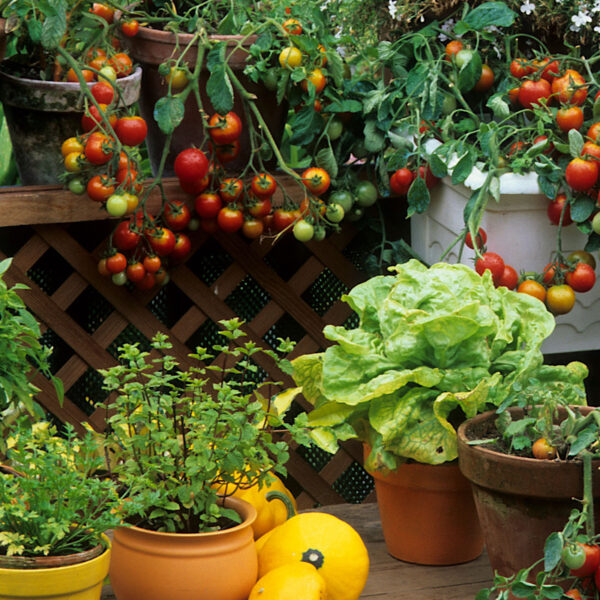
Design Ideas for the Small Vegetable Garden:
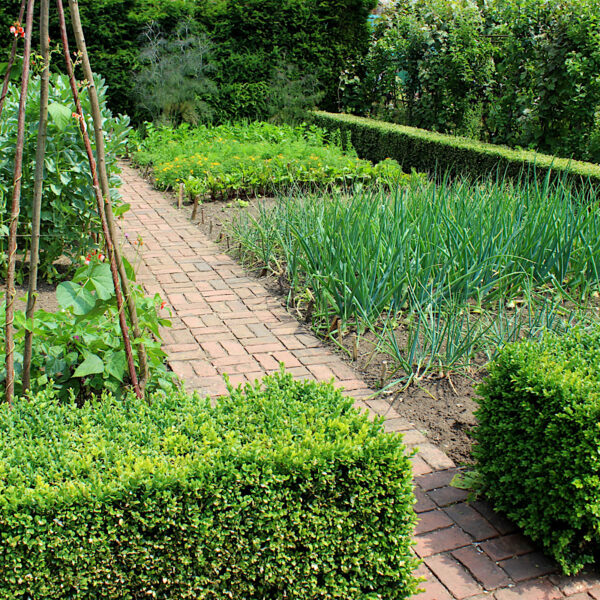
Design Ideas for More Formal Vegetable Gardens

Step 3: Draw Your Blueprint
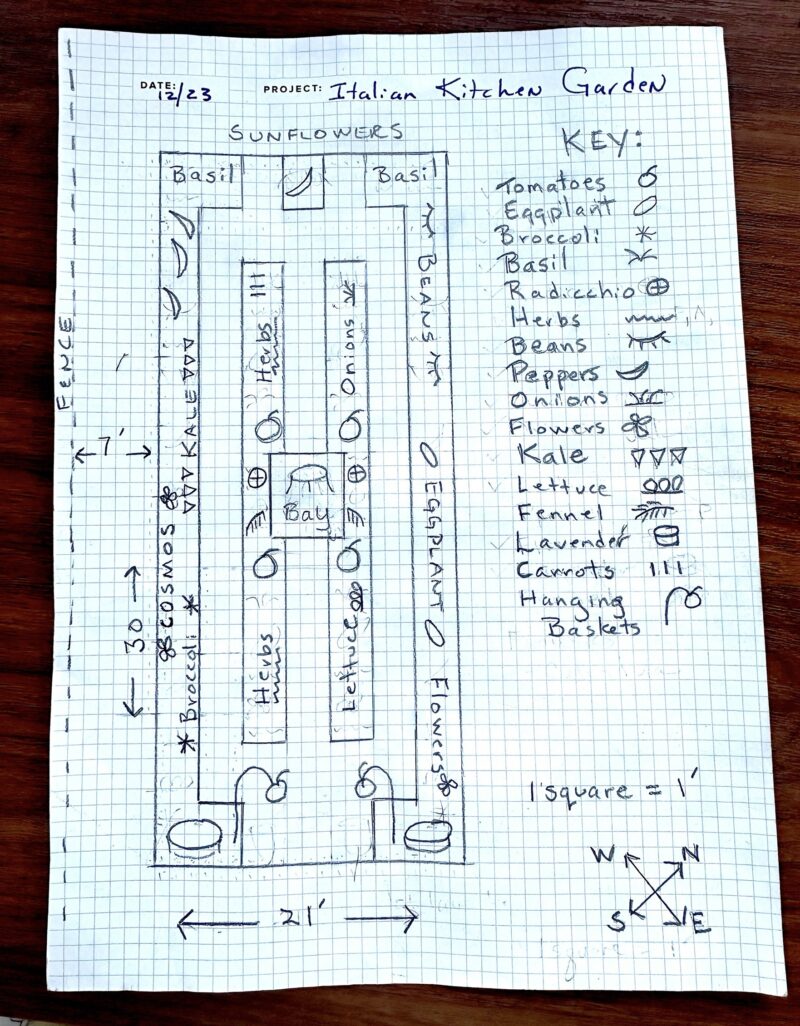
- Measure your space and plot it out on graph paper to get the right dimensions
- Take pictures of your space to have a before and after document
- Think about the additions to your garden that will add beauty and structure consistent with the style you chose above. Ideas for these types of additions that you would purchase might include:
- ornamental containers
- vertical trellises for climbing plants
- garden hooks for hanging baskets
- garden lights
- metal decor for whimsical gardens
- a large water feature for formal gardens
- whirligigs and spinners for whimsical gardens
- perennial sculpted plants (like boxwood or citrus trees)
- garden arches
- sitting benches or tables
- For ideas of popular structures that you can make on your own:
- bean tee pees made from vines or poles
- cucumber arch made from posts and wire grids
- raised beds
- Select the type of garden path you want. For your initial vegetable garden, select a path material that that you can keep weed free but take up or till in at the end of the season. You can add more permanent paths like bricks in the future. Suggested path material for non-permanent gardens would be:
- wood chips
- purchased mats
- grass or bare soil
- On your graph paper blueprint, first lay out the paths and the plant border design. Next, place the structures you have chosen onto the blueprint. This would include everything other than the plants themselves (i.e., vertical fences for climbers, sitting areas, trellises, centerpiece, how you’re going to define borders, the path)
- Lastly, add the plants to your blueprint, using the approximate spacing information included in the charts below.
Step 4: Plan Your Planting and Harvest Schedule
When starting plants indoors from seed, it is best to read the directions on the seed packages, as different varieties of the same vegetable may have specific growing conditions.
I lay out all my seed packages and write the date I plan to start them on the seed package. This date will be the amount of time the package says it needs before planting out, backing that out of your last frost.
For example, if the package says the tomato variety takes 6-8 weeks, I will write March 7 on the package as my last frost date is around May 1st and Mar 7th is about 8 weeks before May 1st.
The charts below should help however, giving you a general rule of thumb for the 12 vegetables and herbs that are common to an Italian kitchen garden:
HERBS:
| BASIL | OREGANO | PARSLEY | FENNEL (FLORENCE) |
|---|---|---|---|
| Start seeds indoors 6-8 weeks before last frost; outdoors: transplant 2 weeks before last frost | Start seeds indoors 4-6 weeks before last frost; oregano is a perennial so grow in pots if your garden is not permanent/perennial | Start seeds indoors 6-8 weeks before last frost Outdoors: transplant 2 weeks before last frost | Direct sow seed outdoors after last frost |
| Spacing: 6-12″ | Spacing: Grow in containers | Spacing 6-12″ | Spacing: direct sow 1-2″ apart; thin to 6-8″ apart |
| Succession Replant: 1-2 times or keep shoots growing by pinching | No need to Succession Replant: Pinch it back to induce bushy growth; Cut back nearly to soil level once or twice in the summer to stimulate fresh growth | No need to Succession Replant: Can produce the entire season | Succession Replant: 1-3 times |
| Harvest: pinch set of 4 leaves at top of plant early on to get side shoots, then pinch 4 leaf sets heavily from whole plant once a week | .Harvest throughout the growing season | Harvest: outer leaves about once a week; don’t remove more than 30% of leaves at one time | Harvest: cut bulb at base once swollen to desired size |
VEGGIES:
| BEANS (ROMA) | TOMATOES | SUMMER SQUASH & ZUCCHINI | EGGPLANT |
|---|---|---|---|
| Directs sow seeds outside 1 week after last frost | Start seeds indoors 6- 8 weeks before last frost; transplant after last frost | Start seeds indoors 3-4 weeks before last frost OR direct sow outdoors after last frost | Start seeds indoors 8-10 weeks before last frost |
| Spacing: 4″ apart | Spacing: 18-24″ | Spacing: ~24-36″ apart | Spacing: 12-18″ apart |
| Succession replant: every 2-3 weeks until July | Succession replant: can stagger plantings and replant depending on zone; | Succession Replant: usually only plant once/season | Succession Replant: usually only once/season |
| Harvest: before beans swell in their pods if cooking fresh | Harvest: when fully colored & a bit soft to the touch | Harvest: mostly when small and tender | Harvest: when fully developed and firm |
| PEPPERS | ONIONS (BULB) | RADICCHIO | BROCCOLI |
|---|---|---|---|
| Start seeds indoors 8-10 weeks before last frost date | Start seeds indoors 8-10 weeks before last frost OR direct sow seeds outdoors as soon as soil can be worked | Start seeds indoors 4-6 weeks before last frost | Start seeds Indoors start 4-6 weeks before last frost |
| Spacing: 12-18″ | Spacing: direct seed 1″ apart and thin to 4″ apart | Spacing: 10-12″ | Spacing: 24″ apart; 12″ apart for broccoli raab |
| No Succession Replanting: usually plant only once/season | No Succession Replanting: plant only once/season | Succession Replant: every 1-2 weeks | Spacing: cut side shoots 1-4 weeks after cutting main head |
| Harvest: when they reach the desired size & color | Harvest: when tops have browned and died back | Harvest: cut head before stem elongates and flowers appear | Harvest: cut main head when “beads” are swollen, but before they separate or open |
| LETTUCE, CUT LEAF | ENDIVE | WINTER SQUASH | KALE |
|---|---|---|---|
| Direct sow seed outdoors 2-4 weeks before last frost | Direct sow seed outdoors in cool weather but after last frost | Start seeds indoors 3-4 weeks before last frost | Start seeds indoors 4-6 weeks before last frost OR Direct sow seed outdoors in spring and again in midsummer |
| Spacing: thickly seeded in rows; thin to 6-12″ apart | Spacing: gradually thin to 8″ apart | Spacing: transplant 36″ apart | Spacing: thin to 12-18″ apart |
| Succession Replant: sow every 2-3 weeks until 4 weeks before first frost | Succession Replant: sow in early spring and late summer (won’t germinate over 80 degrees F) | No Succession Replanting: Usually plant only once/season | Succession Replant: Kale tastes best when plants mature before the heat of summer or after fall frosts occur. |
| Harvest: when leaves are 3-5″ | Harvest: cut head at base when reaches desired size (or blanch by tying leaves together when they reach 10″ long) | Harvest: when they have a thick, woody (brown) stem and a thick rind that cannot be easily punctured with a fingernail. ‘Color is also a crucial indicator | Harvest: kale leaves are ready to harvest when plant is ~ 12″ tall and outer leaves are about as long as your hand |
Step 5: Understand Succession Planting
Succession planting refers to timing your plantings so that their harvesting times are staggered, giving you a longer season. It is difficult to use up all of the produce when it becomes mature at the same time.
In the tables above I have noted some general timing considerations for the common Italian vegetables (reference the row that is labeled Succession).
Timing depends on your climate and growing season.
Living in Minnesota, I garden in Zone 5 and have planned my succession planting times around our growing season, which is generally May 1st through November 1st.
Every garden has a microclimate however, and it is important to understand your particular garden.
The best way to plan out when to transplant your young seedlings to the garden is to look up your average last frost date in the Spring and plant when the soil temperature is safe for that variety.
For replanting, the best way to plan how many times you will replant a particular variety is to look up the first average frost date for the Fall or Winter in your zone and subtract the average time it takes for a variety to reach maturity.
You can usually find these average frost dates for your zone from your local extension service.
The above charts coupled with information on your last frost dates in the Spring and your first frost dates in the Fall/Winter should help in your succession planning.
Tip: keep starting new seeds throughout the season so they are ready to replace the spent plants
Want to go deeper on succession planting? My complete guide to succession planting covers timing strategies, which vegetables benefit most from staggered plantings, how to create a planting calendar for your zone, and common mistakes to avoid. It uses examples from this Italian kitchen garden throughout.
Step 6: Gather Your Equipment
- Starting your plants indoors from seed? You will need a set-up that includes a light source, a sterile soil medium and some small plugs or containers. This guide for Starting seeds indoors will walk you through your equipment needs.
- Growing in a backyard garden plot? Decide how you will prep the soil and get rid of weeds. Depending on the size of your garden you may need:
- electric garden hand tiller
- manual hand tiller (garden claw)
- a sturdy shovel
- a tractor with a tiller
- Purchase your path material.
- wood chips (can get these free when chippers are in your area)
- wooden garden path (can take up in Winter)
- recycled rubber walkway
- gravel, brick, etc for perennial gardens)
- Select waterproof labels.
- low budget might be popsicle sticks, painted rocks, or cut up blind material
- waterproof attractive markers
- Make or purchase row covers to protect against cold snaps and/or shade cloth to protect against brutally hot weather.
- Decide on your watering system.
- hoses
- sprinklers
- t-tape (plan ahead for this).
- Recommended Books
- High-Yield Vegetable Gardening (my go-to book for detailed charts and comprehensive growing information)
- Culinary Gardens (great design ideas and farm fresh recipes)
- The New Kitchen Garden (good details and photography for each vegetable or herb)
FAQ
You can grow a productive kitchen garden in any space. A 10×10 foot plot supports 8-12 vegetable varieties. Balconies work with containers. Start with 5-10 vegetables if space is limited; expand as you learn what grows well in your conditions.
Start with tomatoes, beans, lettuce, herbs (basil, parsley), and one squash variety. These are forgiving, productive, and used in many recipes. Add more varieties in year two once you understand your garden’s sun, soil, and microclimate.
Late winter, 8-10 weeks before your last frost date. This gives time to order seeds, start transplants indoors, and prepare your garden beds. In Minnesota, I start planning in January and begin seeds indoors in mid-March.
No. Raised beds are optional. They help with drainage and soil quality but aren’t required. In-ground beds, containers, and even grow bags all work. Choose based on your space, budget, and physical needs.
Start with what you like to cook. List your favorite dishes, identify the vegetables and herbs they need, then select 5-12 that fit your space and climate. Grow what you’ll actually eat.
Yes. I grow Italian varieties at HeathGlen Organic Farm in Minnesota (Zone 4). Most Italian vegetables thrive in warm summers. Start seeds indoors, use season extension (row covers, cold frames), and select varieties with shorter days to maturity.
Check out this Beginners Guide to a Kitchen Garden for starting your own vegetable garden, whether in a garden plot or on an apartment balcony.
Wondering what material, you recommend for the raised bed? I have had wood before that breaks down within a few years. I am considering, painted metal, and cinderblocks-thoughts?
Thank you,
Heidi
Yes, we also used wood which broke down fairly quickly in our climate. My husband put in some very large raised beds last year using corrugated steel panels for the sides. That has been working well for us. In our herb garden we used the concrete pavers you get at the home stores, as they are prettier. They have worked well for over 10 years now. Your idea of cinderblocks sounds like a good one as that would be similar to the pavers (which are expensive).